Table of Content
Watch this video for more in-depth instructions. Make sure you have your shears or clippers and a comb on hand. Use clips to help section your hair into manageable segments. Snip with the ends of the shears rather than with the full length of the blade. There are plenty of ways to change your look without being extreme or doing something you may regret.
Comb out small sections with a fine-tooth comb, clamp it between two of your fingers, and then snip upwards with your scissors. You don’t need to cut into the hair very much, even a few millimeters will soften the edges. Once you’ve cut your hair straight across, you may find that your hair looks a little heavy or blockish. One of the possible ways to lighten the look is to make a few vertical snips into your hair. If you want to take some of the weight out of your hair, you’ll need a pair of texturizing shears . And, for those going for a pixie cut, get some good clippers and a few different size attachments.
Best Anti-Humidity Hair Products to Keep Hair Straight
This tutorial and this tutorial are both great options for highly textured hair. If cutting over your bathroom sink, close the drain to keep hair from falling into it. Use a handheld mirror to examine your neckline after tapering it to make sure it looks neat and even. Comb the top of your hair down toward your sides.

But I have found that I have been able to save money on trims by not waiting in line at the local discount cut. If you already have them, and they're getting too long, this is a great tutorial for trimming bangs. "Easy to follow and complete instruction. Just what a person needs the first time they cut their hair. Thank you." Have someone you know cut your hair instead if you're worried about making mistakes or getting hard-to-reach spots. Lift your hair with the clippers as you approach your temples and earlobes.
#2: Wet Straight Hair, Dry Curly Hair
The second thing you need to do is find the right hair products. Again, if you’re not sure what to use, you can ask a hair stylist for advice. You’ll need a good shampoo and conditioner, as well as a styling product. Do not try to use these steps for a real haircut- you may be disappointed.

Trimming your hair a little longer than your desired length is a good idea for two reasons. Firstly, hair cutting can get tricky and if you have made a mistake, you’ve got some leeway to fix it. Second, if you’re cutting your hair while it’s wet, then it will usually look shorter once it has dried.
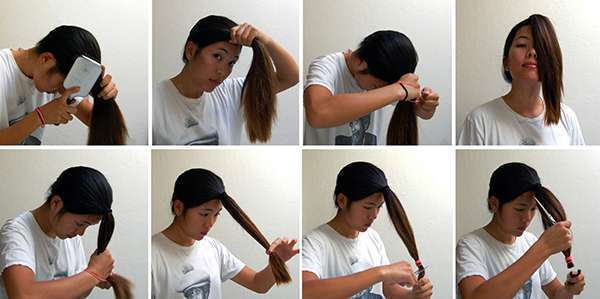
#3: Separate Your Hair into Sections
The last thing you need is to be left with a haircut that makes you more upset than the way it was before you messed with it. Leave a major chop up to the professionals, post-quarantine. However, if you have a few rogue split ends or overgrown bangs, that's something you can manage—promise. Here, hairstylists share their professional guidance on how to cut your own hair at home. The type of trim you'll want depends on your curl type .
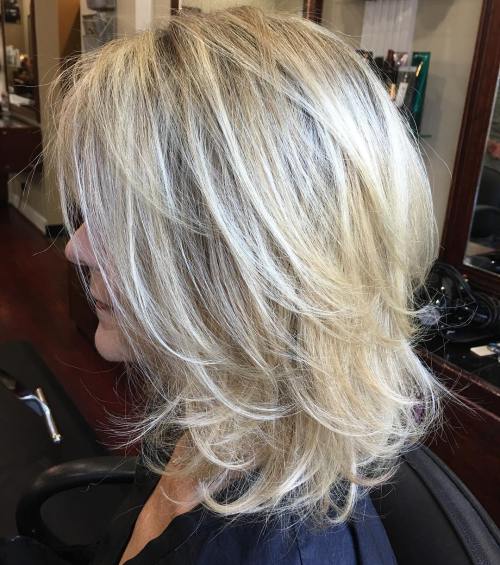
Courtney Foster is a Licensed Cosmetologist, Certified Hair Loss Practitioner, and Cosmetology Educator based out of New York City. She received her Cosmetology License from the State of New York after training at the Empire Beauty School - Manhattan. This gets rid of any uneven pieces so your hair is all the same length. You can stop here if you need the layers concentrated at the front.
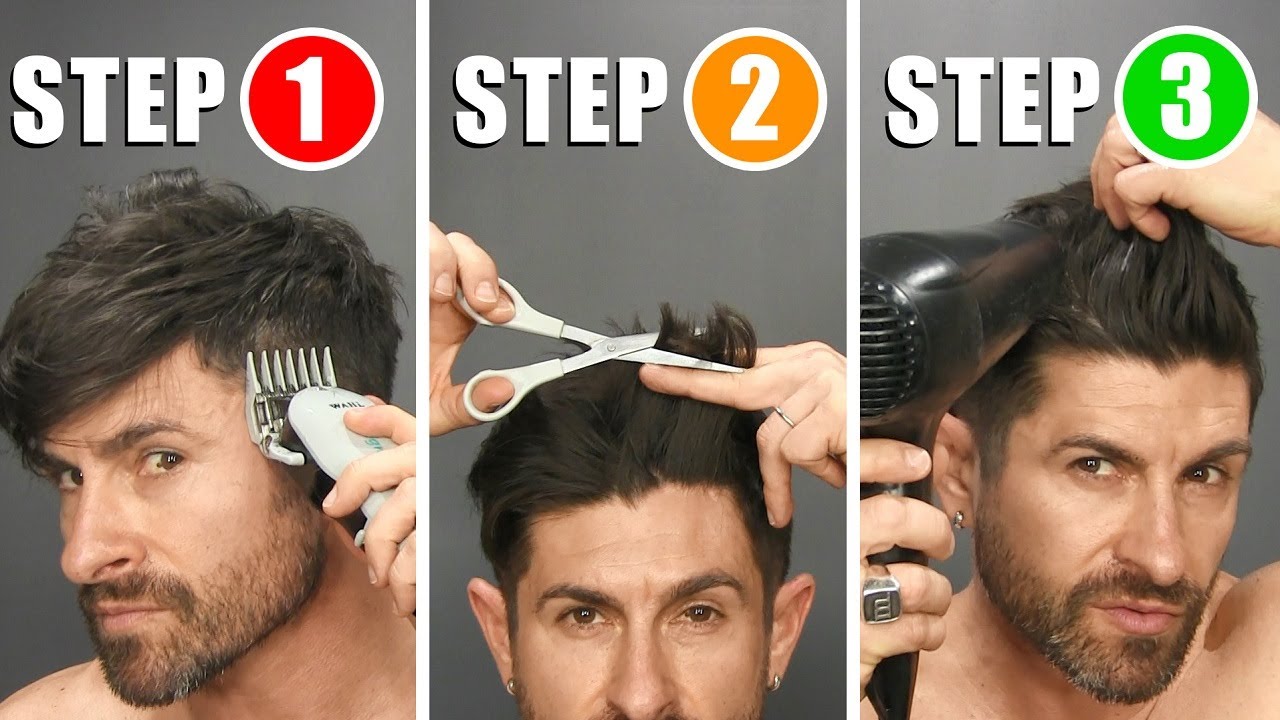
Pay special attention to YouTuber Pick Up Limes’s technique for point-cutting . If you’re looking to cut your own pixie haircut, it’s important to have the right tools and know the right techniques. Here’s a step-by-step guide on how to cut your own pixie haircut at home. When you’re ready to cut your hair short, you’ll need to gather the appropriate tools and follow these simple steps. To maintain a short pixie style, Kaye uses clippers, shears and lots of clips on her semi-relaxed hair.
Then, repeat this process on the other side of your head before moving to the back, making sure to transition between lengths at the same point on both sides. Use clippers on a small guard setting to cut the back and sides. Clippers are the best for the back and sides for beginners or those who want a basic haircut. Set your clippers' guard, which controls how much hair you can cut, to 1 (3 mm or 1/8 inch) or 2 (6 mm or 1/4 inch) to make conservative cuts while you work.
Bring hair to the front and snip at an angle or straight, depending on if you prefer a rounded or blunt shape to your cut. Extend the straight-edge line you created with your guide cut by trimming the overgrown hairs.Take a few deep breaths to steady your hand if needed. Do you desperately need your hair trimmed, but don't want to pay at the salon? Or, are you in-between cuts and need to look good fast? Here's a basic guide on how to trim your own hair at home for less.

Make sure to use the exact same scissor-pinch motion.You should be able to see a sharp contrast between trimmed and non-trimmed hairs. Be sure to work-out any knots or tangles and repeat as necessary. Make a scissor like motion with the index and middle fingers of your free hand and "pinch" off two-to-three inches of hair. Be sure to select hair from the bottom section and on one-side of the scalp or the other, but not the middle.
Swap out your clipper guard to one setting shorter than you were using before. For instance, if you were using a 4, move to a 3. Trim your hair from the bottom to top with the shorter blade guard. Stop about 1 inch (2.5 cm) under where you cut with the longer blade. To blend short hair on the sides with longer hair on the top of your head, pull your clippers further away from your head as you get towards the top of your head. The best time to cut your hair is when it's damp, but not soaking wet.

When in doubt, you can always wait and book an appointment with your favorite stylist once you're fully vaccinated and they have time to see you. Below is our best trimming advice, along with some links to tutorials that will help you with the basics. Use your clippers or a beard trimmer to cut the hair growing on the nape of your neck. Start with a grazing cut at the top of the neckline, then cut progressively closer as you work toward the nape of the neck.